
How to Finish a Pillow
Simple Pillow
There is quite an array of materials from which to choose when it comes to stuffing pillows. You can buy a pre-made pillow for, or you can find polyester batting, wool and feathers. Pre-made forms are usually square and come in standard sizes such as 12”X12”. Make your needlepoint project the size of your intended pillow, plus 2 rows of Continental stitches on all four sides.
 Not Ready For Finishing
Be sure your needlepoint is flat. If not, you will need to wet block or steam block your project.
If you have not done so, stitch 2 rows of Continental stitches on all four sides of your project. This is for seam allowance.
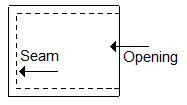
Place the needlepoint and pillow fabric right sides together. You may wish to pin to secure while sewing the seam.
When finished, turn the right side out.
Insert the pillow form into the opening. Turn the seam allowance of the needlepoint and fabric into the pillow, and hand stitch the entire length.
Polyester batting is a loose fiber that can be shaped into any form. Round, cylinder, triangle and other shapes turn out best when they are stuffed with polyester fill. To use, stitch between the Continental rows and the motif on all sides, leaving a gap large enough to turn the needlepoint and fabric inside out. When this is finished, you will stuff as needed. You will then tuck the raw edges inside and finish stitching the edge by hand.
Pillow with Piping
Adding piping to the seams of knife edged pillows as well as boxed pillows creates a wonderful, finished look. You might consider piping as a frame for the needlepoint depending upon the effect you wish to achieve. If the stitching uses many colors, you might simply want to use the color of your backing fabric.
Add bias cording around your pillow by following these simple steps:
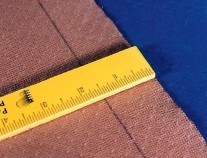
With a pencil, draw a line 1-1/2” from the edge of the fabric that has been cut on the true bias. Repeat the marking process again, using the pencil mark to measure your next line.
Cut the strips on the marked lines.

To make the bias strip the correct length, it is necessary to join the end. To do so, place the right sides of the fabric strips together, joining the ends of the strips.
Using a sewing machine, stitch 1/4” along the edge. Repeat until you have added enough strips for the entire length you need.
Press all seam allowances open.

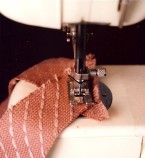
Place cord inside the bias strip you have created. Roll the fabric around the cord and stitch, with a zipper foot on your sewing machine, along the length of the cord and tape.
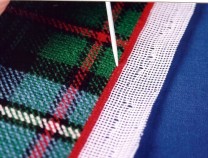
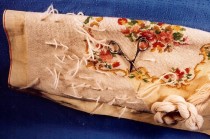
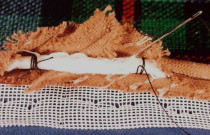
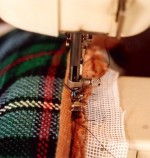
The two extra rows of Continental you added to the stitching of your needlepoint serve as a seam allowance. Note the picture. The needle indicates the necessary placement of the machine stitching.
Pin the cording in the middle of one side on the needlepoint and stitch the bias cording down onto the project.
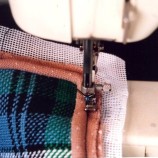
To miter the corners, you will need to have the sewing machine needle down into the needlepoint. Lift the pressure foot up. With heavy sewing scissors, clip the bias strip at a 90 degrees angle from the cording. Pivot your needlepoint and cording to stitch the next side.

Continue stitching until you arrive at a point three inches from your starting point. It is imperative that you have enough piping and cord to overlap the ends.
Lay the ends of the cording together. Trim the cord so that you have a 2” overlap.
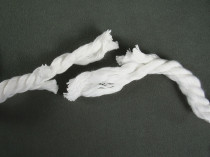
Separate the four plies of the cording, and cut away two.
Repeat the same process on the other end of the cording.
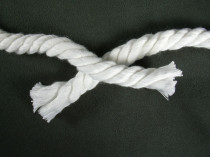
Twist the remaining ends together to make a single complete cording using two plies from each end.
Stitch the ends to create a single, continuous piping.
Fold the bias fabric over the cord and stitch.

On the right, you will see a continuous seam without gaps.
Corners

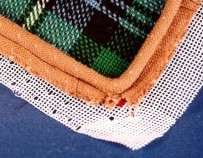
Whether you use a pre-made pillow form, loose batting or feathers, your pillow can have round or square corners. Not all designs are good candidates for round corners. Four-Way Bargello, plaids, square motifs and other designs that create exact rectangle patterns may not be appropriate on round-cornered pillows.
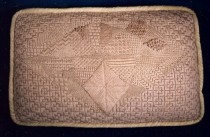
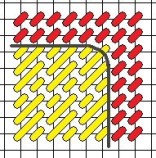
Here, you can see a square corner. Note the small red stitches. They represent Continental stitches for the seam allowance. The yellow Cashmere stitches are the stitched motif. Long horizontal and vertical gray lines represent the placement of the machine stitching. A very sharp corner was achieved by stitching along the Continental rows.
In this diagram, you will notice the same set of stitches. This time, the corner has been stitched to make a soft curve. Imagine a nosegay of flowers on this pillow. The roundness of the flower petals and bending stems, combined with the soft edges of the pillow, create a relaxed feeling. Piping, cording and braids can all be used with curved and rounded corners.


