
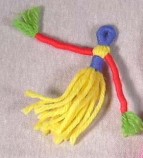
Yarn Doll #2
This project is a hit with young and old kids alike. I have taught this project to Girl Scouts, libraries and fairs. Many go home full of ideas to make more. I had one little girl who said, "I'm going home and make a whole family!"
You will need:
Cardboard 18” and 10” long
Yarn
Scissors
Tapestry needle
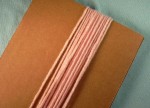
1. Wrap yarn around 18" cardboard 15 times.
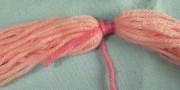
2. Cut both ends of yarn on cardboard and place on table. Working from the ball of yarn, wrap the center of the bundle 3 1/2". To start your yarn, work the wraps on top of the end.
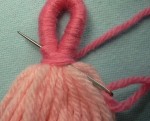
3. After you have reached 3 1/2", fold the coll in half and close the loop with 1/2" wrapping to make neck. To end the yarn, cut from ball and thread the tapestry needle. Run the needle up through the wrappings. Cut excess off.

4. For arms, wrap yarn around 10" cardboard 7 times. Cut ends and place on table.
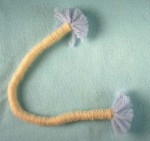
5. Wrap firmly with yarn leaving about 1/2" of yarn at each end. Trim ends.
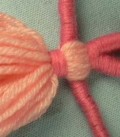
6. Split the doll in half and insert arms. Wrap chest area with yarn to make waist band.
Trim the bottom of the skirt to make straight.
If you wish, you can braid the arms for a differnt look.

Add Google eyes, hair and other fun things.
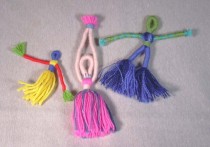
Try wrapping their arms above their head to make neck lace. You can split the yarn in half and make legs. Try making large dolls, medium dolls and very large ones for a family.


