
Plastic Canvas Ring for Children
1 Sheet plastic canvas
1 Worsted weight yarn (example Redheart)
1 Button
Tapestry needle #16
Sewing thread to match yarn
Sewing needle
Paper scissors
1. Cut the plastic canvas so that you have 3 by 16 bars. Be sure to use paper scissors when cutting out plastic.
2. Cut 16 inches off your yarn ball.
3. Thread your needle with yarn. (See How To Thread A Needle)
 Continental
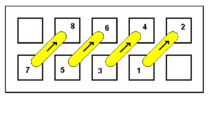
4. Look at the picture on the right and you will see how to make Continental stitch. Start with a Waste Knot. Now, bring your needle through the hole at 1. Now, go back down to the underside of the canvas at 2. You will come back up at 3 and down at 4. Repeat this until you have finished the row.
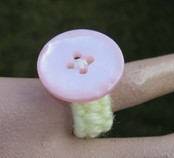
5. The picture below will show you how the ring should look. Be sure to make 14 Continental stitches.
 Continental stitch on plastic canvas
 Whip Stitch
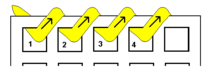
6. Look at the picture on the right. This is how to make Whip stitch. You will make Whip stitch on both sides of the ring.
To make Whip stitch, bring your needle to the top side of the canvas at number 1. Go back to the underside of the canvas and come back up at number 2. The yarn will make a spiral on the edge of the canvas. This makes a pretty way to finish the edges of the plastic canvas.
The picture shows how Whip Stitch should look on your canvas.
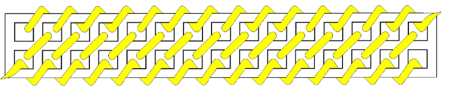 Continental and Whip Stitches
7. Make a circle with the canvas and sew the two ends together with yarn and your needle.
8. Put sewing thread in your sewing needle. Sew on the button.
9. Your ring is now finished. Put the ring on your finger and enjoy!


