
How to Applique` Needlepoint Canvas (Rounded Effect)
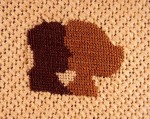
 Design is an adaptation of Julie Hockin's "Hedgehog" (c)
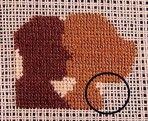
At times a larger sized canvas is desired for the whole of a project but a certain spot requires a smaller canvas for details. This can be achieved by attaching one canvas on top of another. An example of this is in the photo on the left. Notice the three hedgehogs. The hedgehogs are worked on 22/1 canvas and the ground fabric is 18/1.
To applique canvas, the smaller count canvas should be either Penelope or mono since the canvas threads must be seperated.
The following steps are required to attach a petit point section to a gross point:
Stitch your petit point section, making the stitched area as square as possible. Do not leave small voids.
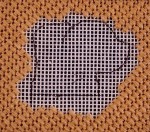
On the ground fabric, stitch close up to the area in which the petit point is to be appliqued. You may wish to mark the exact placement on the canvas before stitching.
Cut the petit point canvas four inches from the stitched area. (You will need this length to weave the loose threads.) Unravel the canvas right up to the stitches but use great caution to prevent the stitches coming undone.
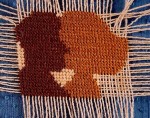
With a tapestry needle, poke the petit point into the gross point using your guide lines on the ground canvas. Be sure the petit point lies flat without unsightly bulges.
On the underside, weave the petit point canvas threads into the gross point stitches.

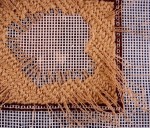
Finally, fill in the void area on the gross point. Be sure to stitch as close as possible. Do not leave raw canvas showing.
Here is the final result. This process will give the petit point a slight raised effect without padding.


