
Framing Needlepoint Staple Method

One of the most expensive and popular ways to finish needlepoint is to have it framed. You have many options. You might choose a deep or shallow frame, wood or metal. There are countless styles available. To spare yourself cost and trouble, you can plan ahead and purchase a premade frame and create a project to fit your purchase. Frames can be pre-fabricated, custom-made or made from pairs of molding strips.
To Mount
The following items and materials are needed:
Frame (Purchased)
Measure
Ribbon
T-square
Stretcher bars
Needlepoint
Scissors
Stapler
Staples
Glue
Ruler
Wire
Hammer
Razor blade
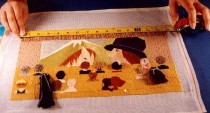
Measure the needlepoint project to determine the necessary size of the frame and stretcher bars.

Piece the four sides of the stretcher bars together. You may need a hammer to tightly drive together the tongue and groove.

Tighten tongue and groove.
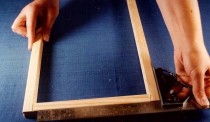
Use a T-square to align all four corners.

Staple the corners to secure them.
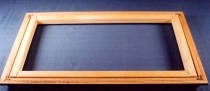
Check the stretcher bars against the frame to ensure correct size. The bars should be slightly smaller than the inside of the frame, to allow space for the canvas.
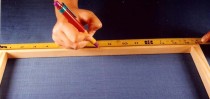
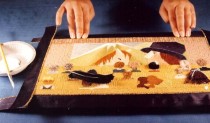
Find the middle of each edge of the needlepoint and stretcher bars. Mark a line for future reference.
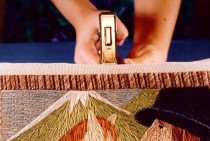
Staple all four sides of the needlepoint at the middle of each edge on the bars, using the marks you have made. Staple again, on either side of each of the first four staples.
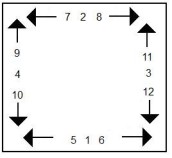
Continue to staple until you reach all four corners, where you should place the last four staples. Hint: Use the grid of the canvas to help align the project on your boards.

When the needlepoint is straight on the bars, tighten the staples using the hammer.
 Step 1
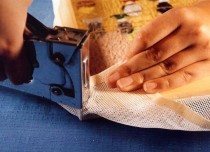
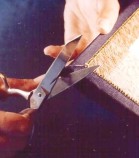
To miter the corners, first pull the point towards the center of the needlepoint and staple it. Then pull one side toward the middle again secure with a staple. Repeat on the other side of corner. Do this on all corners. Trim any bulk. Do not be afraid to trim-your project will not come loose at this point. Bulk only detracts from the final appearance.
 Step 2
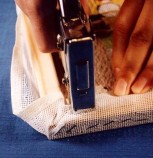
Continue to secure the corner on each side of the point.
You may choose to use a matte board to finish the edges on the picture. In the example, a ribbon is used in place of the matte board. The ribbon is glued to all four edges, except for the corners, which need to be trimmed.
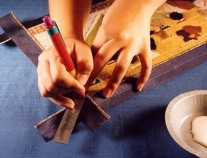
Mark the corners with a pencil, making a straight line at each point where the ribbon overlaps.
Cut the marked line through both ribbons, to make a neat miter.

Insert the project into the frame and secure with staples.

Run a line of glue on all four sides of the frame.

Place brown package paper on top and smooth the edges. When dry, use a razor blade and trim the edges close to the frame.
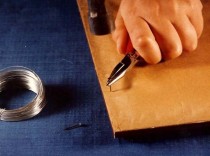
Hammer a nail 2/3 up on the right and left on the underside of the frame, and then attach wire. The picture is now ready to hang.


