
Shisha Buttonhole Method Stitch
 Needs Thinking
Uses: Details, Flower Centers, Sun, Spot lights on stage
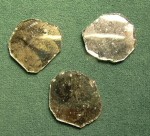
Shisha mirrors, from India, are thick mirrors with a washable backing which is a blue color. Traditionally, the mirrors would have thick hand blown glass with a metal onto the back. They would then be broken up into workable sizes. Shapes and sizes would vary. As you can see on the side photograph, air bubbles and imperfections occur. The mirrors are washable. Also, they are bleachable and boilable. If needed, the item can be dry cleaned.
 Rajmahal Shisha Mirrors
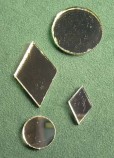
Also on the market is machine made shisha. These come in perfect shapes. You can find them in diamond, square, round and various sizes. Pictured is Rajmahal Art’s shisha mirrors.
When purchasing the mirrors, you might find slight rough edges. If this occurs, a honing stone will remove any imperfections.
First Step: Working Frame
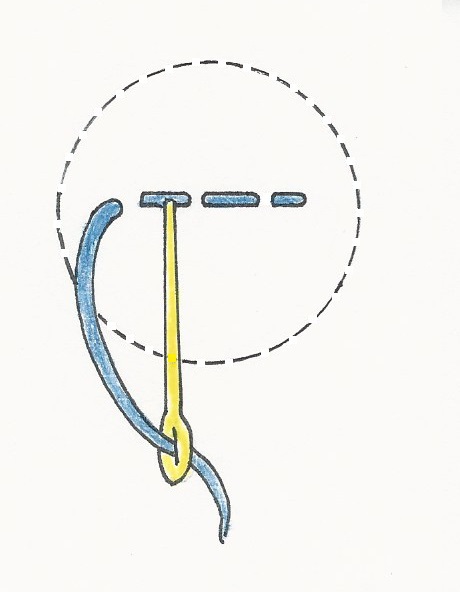 Diagram 1
We have 3 ways of working the frame. 1.) The anchored "tic tac toe" which holds the mirrors most securely. 2.) The two triangle holding frame. 3.) The two square holding frame.
1. Make the "tic tac toe" frame, it is important to follow the sequence and placement of the numbers. If you are left handed, turn the diagrams around. Make two very small running stitches which will be hidden by the mirror. Then go backwards, slitting the second running stitch. (Diagram 1)
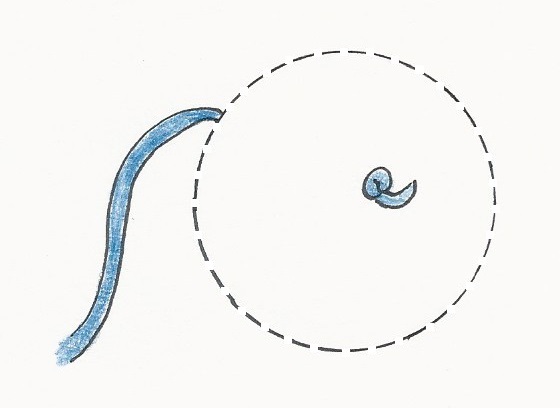 Diagram 2
Or, you may wish to begin with a small knot. (Diagram 2) Note: The running stitch and know are UNDER the mirror. The diagram shows mirror placement.
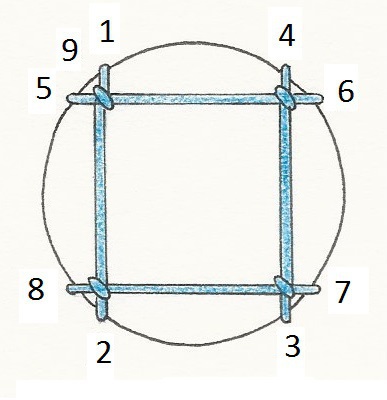 Diagram 3
2. Holding the mirror on the cloth with your left thumb and your index finger under the cloth, bring the needle out at one. Go down at 2. Bring your needle up to the topside of the fabric at 3 and down at 4. From 4, All holding threads should be right against the mirror and quite snug. Also, notice the small distance between 1-4 and 2-3. (Diagram 3)
3. To continue the tic tac toe pattern, you will come out at 5. As you go over towards 6, the needle and thread pass over and under 1-2, with the working thread UP then over and under 3-4. From 5, go under and out at 7. As you go from 7 towards 8, the needle and thread pass over and under 3-4 with the working thread DOWN, for the opposing tension, then over and under 1-2. Insert the needle at 8.
4. Come out at 9 between 1 and 5. Turn the piece so that 9 is towards you at the 6 o'clock position. You are now ready for the second step.
Second Step: The Holding Frame
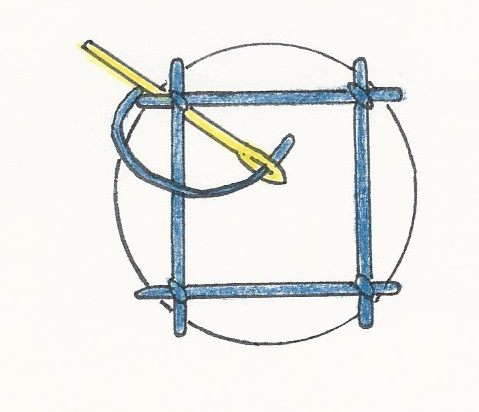 Diagram 4
1. With the thread coming out at 9, hold the thread to the right. Slide the needle under the 1-2 and 5-6 intersection. You will insert the needle from the center of the mirror out towards you with the needle UNDER the bar, and pull the needle over the working thread snugly. This will make a twisted loop on the foundation. (Do not pull the thread too tightly. You will loose the mirror.) Note, if you can pull the foundation threads past the side of the mirror, the tic tac toe combination is too loose. Stop and remake the foundation. (Diagram 4
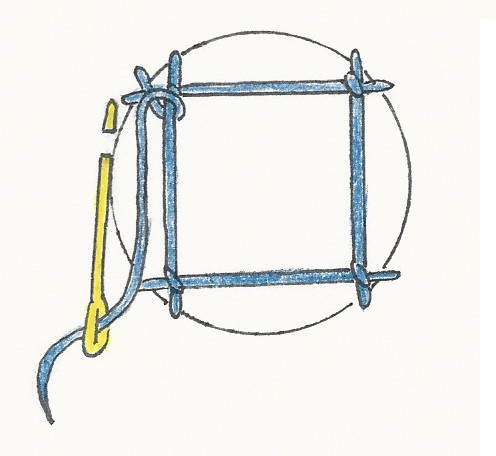 Diagram 5
2. With the working thread circling above the needle, make a small stitch, working clockwise. Each stitch should be about 1/8". (Diagram 5)
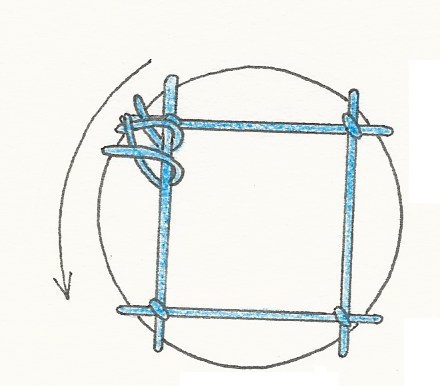 Diagram 6
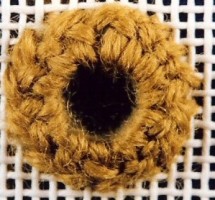
3. Repeat the two steps working around the mirror. You should adjust the tension as you work so as to get a round shape. Once the shisha mirror is locked in, there are many ways of surrounding it with ornamental stitches. (Diagram 6)
The diagrams below are two other foundation patterns which shisha can be anchored onto the fabric. Please note: Both holding patterns are interwoven to create a tight holding frame. Be sure to start your buttonhole stitches at the dot which is indicated on the graphs. This will lock the foundation and the mirror will be secure. (Diagrams 7 and 8)
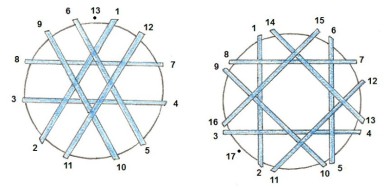 Diagrams 7 and 8


